This lab was a continuation of field activities 3 and 10 which involved navigation of the UW-Eau Claire Priory. We were in our same groups as in the previous labs however this time we would be navigating the Priory with a different purpose. In this lab we would to create a new set of navigation points for future groups to use for this assignment. We were to collect these points using a GPS device and UTM coordinates.
Methods
Since each group once again had three members the roles were divided accordingly. One person was to use the GPS, another should relate the map used in last week's lab to the GPS and the final group member should be in charge of determining the compass bearing as well as determining the most efficient route of navigation.
The first step of this process was to work with the other groups to determine which regions of the Priory we would be working in so that there was little overlap of new navigation points. Next we needed to determine a total of 5 points which we would be navigating to making sure not to be close to the other groups. In order to keep the naming conventions consistent throughout the class we numbered each point first with our group number followed by the point number.
Next we needed to test the navigation of our points. We marked each point by wrapping flagging around a large tree several times as well as using a marker in order to write down the location based on the naming scheme discussed in the previous paragraph. Next, we collected the point location using our GPS and took a picture of the points with a camera (Fig. 1-5).
 |
| (Fig. 1A) This image shows point 5-1 from a distance. |
 |
| (Fig. 1B) In order to properly label each navigation points we labeled the trees with flagging and marking the tape with the point information (Jacob is doing that for this point). |
 |
| (Fig. 2A) This is a close up image of point 5-2. |
 |
| (Fig. 2B) This image shows a view of point 5-2 from a distance. |
 |
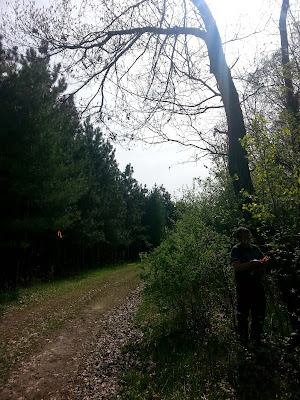
| (Fig. 3A) It is a bit difficult to see in this image but Jacob is marking point 5-3 on the right side of the image. |
 |
| (Fig. 3B) A close up view of the location of point 5-3. |
 |
| (Fig. 4A) This image shows point 5-4 from a distance after it was marked with flagging and the point number. |
 |
| (Fig. 4B) This image shows a close up view of the location of point 5-4. |
 |
| (Fig. 5A) Here point 5-5 can be seen and it is clear how important it is to properly mark the trees with flagging in order to ensure that whoever is navigating this course later can find the points. |
 |
| (Fig. 5B) This image shows a close up view of point 5-5. |
Discussion
This lab exercise combined the skills we learned in many of the previous labs. From using a GPS unit correctly to collect field data to navigation methods to mapping of GPS data we collected ourselves using ArcMap. The most difficult portion of this lab exercise was creating a navigation which did not come in contact with other groups. It was much easier this week to navigate the area though after our practice with our maps the week prior. Based on past experience we made sure to double check that our GPS was correctly recording the data points as we went to ensure that we didn't return to the lab only to find that something went wrong during data collection.
Conclusion
Throughout this field activity we practiced applying all of the skills we have learned in this course thus far. It was also enjoyable to have the opportunity to work as a class. This lab helped us to practice the basic navigation skills as well as the the more modern techniques as well which was very valuable.
No comments:
Post a Comment